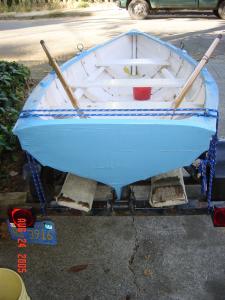
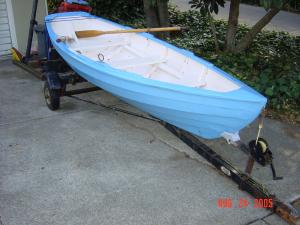
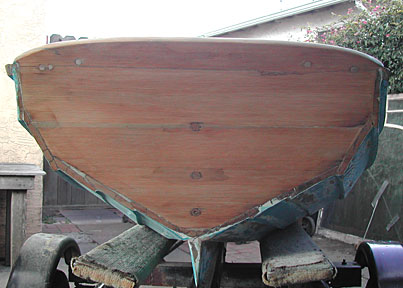
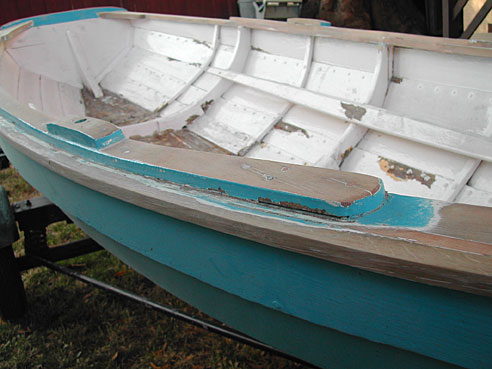
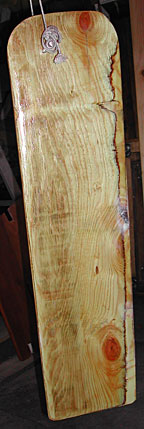
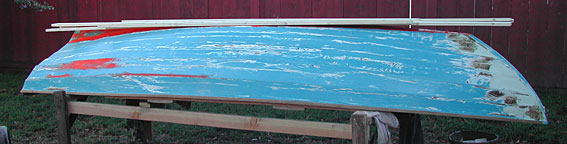
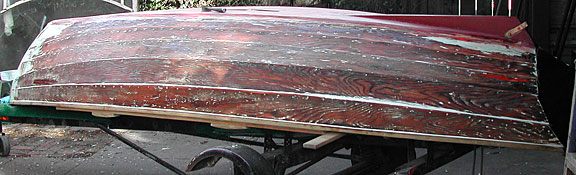
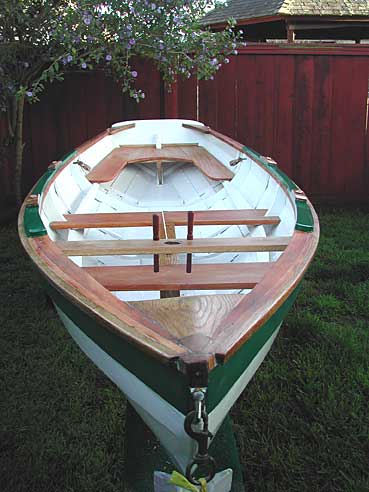
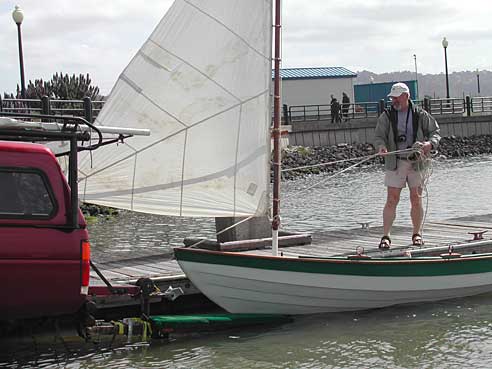
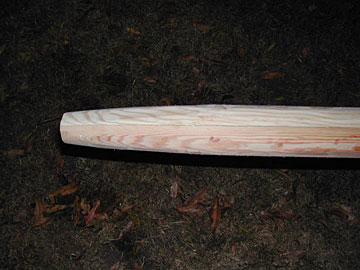
| I purchased this
13' 5" Chamberlain dory skiff in San Anslemo in mid-September 2005.
According to the seller it had been built by the SF Maritime Museum's
boat-building class in the early 90's, made from solid planks of
straight-grained fir attached by copper nails and roves over sawn and steamed oak frames. Above are the
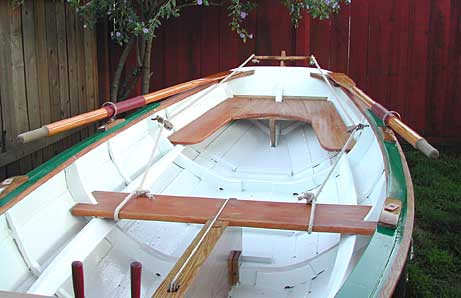
seller's photos from craigslist where I found the boat listed. 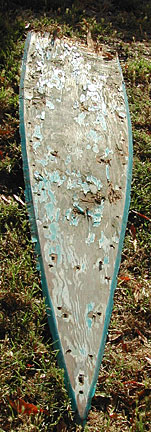 Unfortunately, before being finished by a guy from the class who took the
boat home, he dropped it from the garage rafters and cracked the transom
and some of the planking. He sold it, and the boat was repaired and finished
by the guy in San Anslemo, but somewhat neglected over the years and
suffered some rainwater damage. The trailer was for a different boat but
worked well enough to get the boat to my home in Richmond, CA.
Unfortunately, before being finished by a guy from the class who took the
boat home, he dropped it from the garage rafters and cracked the transom
and some of the planking. He sold it, and the boat was repaired and finished
by the guy in San Anslemo, but somewhat neglected over the years and
suffered some rainwater damage. The trailer was for a different boat but
worked well enough to get the boat to my home in Richmond, CA.
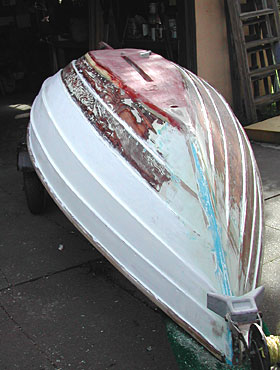
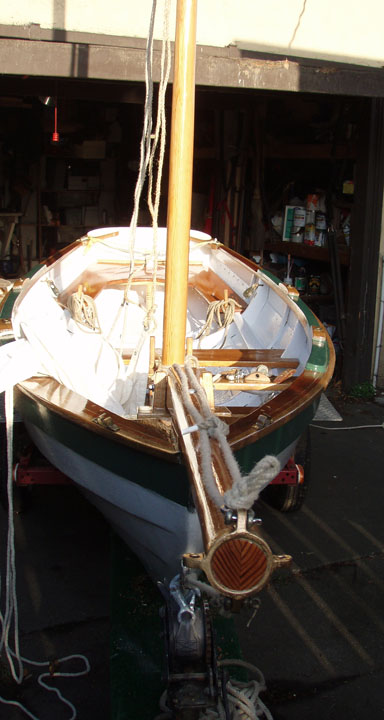
I immediately started work on the boat,
pulling off the two aft bottom cleats due to minor rot from rainwater. Any
loose or bubbled paint on the interior was also removed with chisels and scrapers.The false or second bottom is designed to protect the vital actual bottom planks from damage due to trailering or rocky beaches, and Gardner's plans call for oak skid-rails, solid planks, or plywood. The ply false bottom had rotted badly from rainwater, particluarly at the join where the 8' sheet was joined to the next section by the fore part of the skeg. This was replaced by solid fir planks, painted and bedded in lead or other compounds to eliminate the chance of any further rot. The real bottom planks were cleaned, scraped to remove any soft wood, soaked in CPES, and any gaps filled with epoxy fairing compound from Smith & Company here in Richmond. |
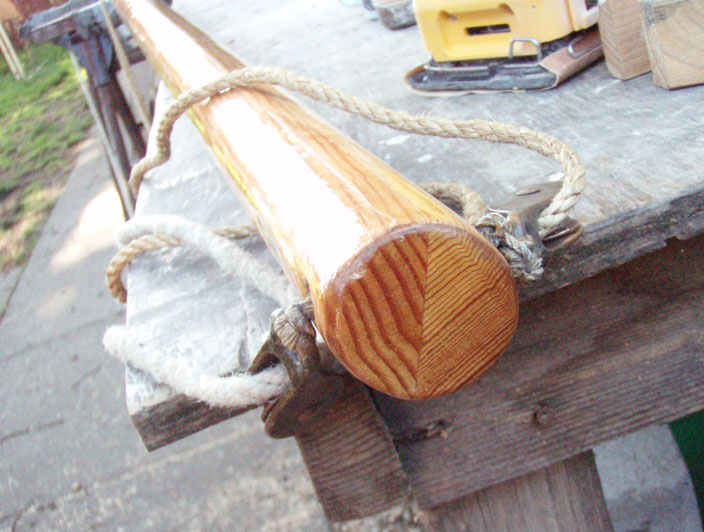
| 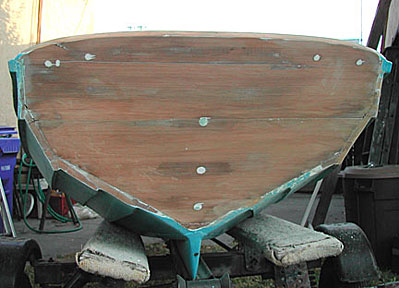 
Transom - before and after using colored epoxy and wooden plugs (bungs) in the screw and bolt holes. The marine enamel did not respond to
paint stripper, so I purchased a beltsander with fine grit belts and set to
work carefully removing the paint from the outside of the transom and the
top and sides of the gunwales. You can see some of the damage in the form
of a repaired break right along the line of top screw-holes in the transom.
I was told that it was repaired with West Systems epoxy, and the repair
seems quite strong.
|
|  I spent a lot of time on the excellent Wooden Boat forum, asking questions about the design,
restoration techniques, and possible modifications. I could not have done the work without the many helpful folks on this forum. I spent a lot of time on the excellent Wooden Boat forum, asking questions about the design,
restoration techniques, and possible modifications. I could not have done the work without the many helpful folks on this forum. Did I mention I planned to go sailing? Even though designed and built as a
pulling boat, John Gardner's design for the dory skiff also includes a sail
rig, centerboard and rudder plans. I picked up a slightly warped mast for $15 and after sanding the mud and peeling varnish off, it turned out to be 13' of solid mahogany! I've straightened it, will leave it finished with linseed oil rather than varnish, and hope to use an old cotton mainsail purchased from a loft in Florida. I also purchased a complete mast, boom and sail for a Sabot, which can be used for windy days as the mast is light and the sail's size under 40 sq. ft.
|
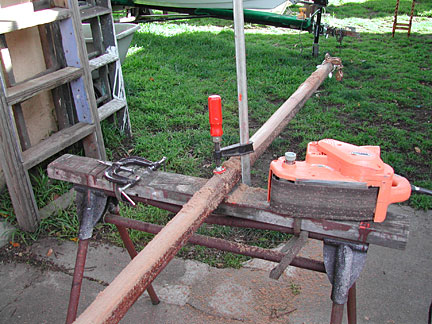
|  Here is the 13' mahogany mast being persuaded to bend straight -- the top 1/4 section has about a 1" warp. These buckets of water should do the trick after some time, as who knows how many years it had the bend before I got it. It is being coated with a 50/50 mix of turpentine and boiled linseed oil.
|
|   The fir thwarts looked much nicer with the paint sanded off and the first coat of boiled linseed oil with turpentine. They will get many more coats before they are done.
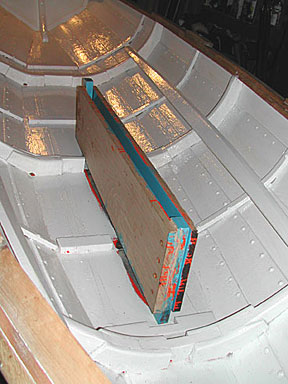
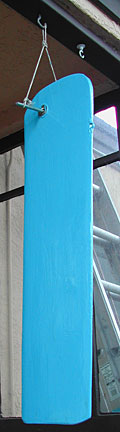
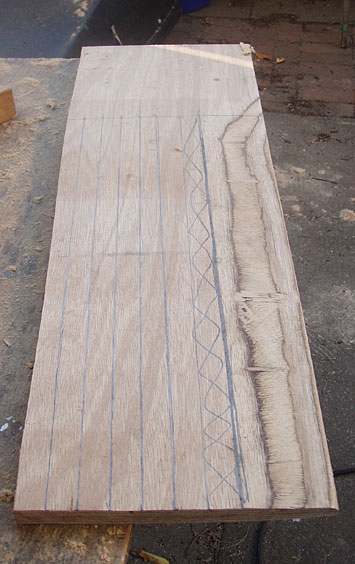
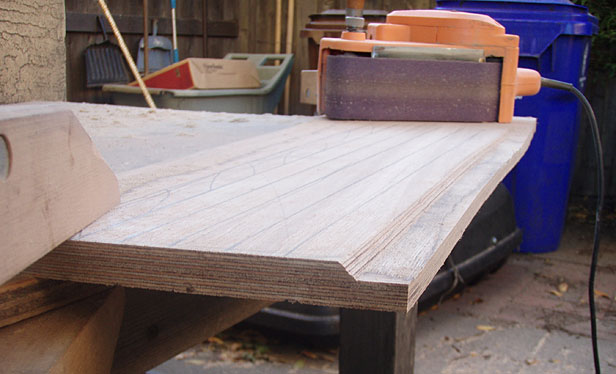
The 3/4" plywood centerboard being coated in the first of several layers of epoxy - it is smoother than it looks, and the layers of ply help to show the thickness when creating the foil (wing) shape with the beltsander. This will be the only piece of plywood in the boat.
|
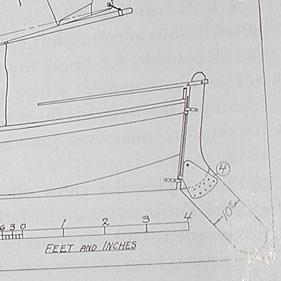
| 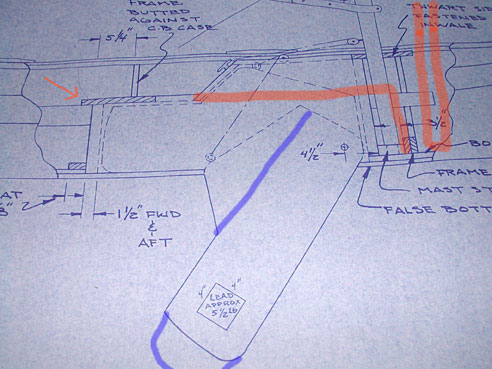 This is a photo of the blueprint plans for my boat from the Mystic Seaport Museum -- you have to order plans from museums when your boat was designed in the 1880's.
To avoid losing the front thwart to the traditional "humpback" centerboard case design, I've modified the plans (as Gardner did for some boats) to go for a slightly longer and narrower centerboard (thick blue lines), which allows a narrower case (thick orange lines). I'll move the mast forward, will need a small bowsprit to rig a jib on this boat.
|
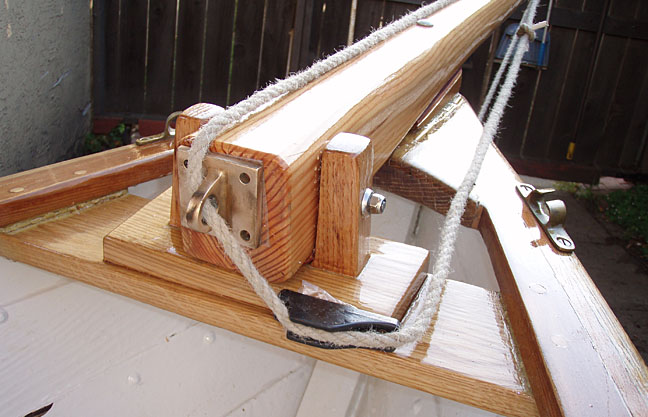
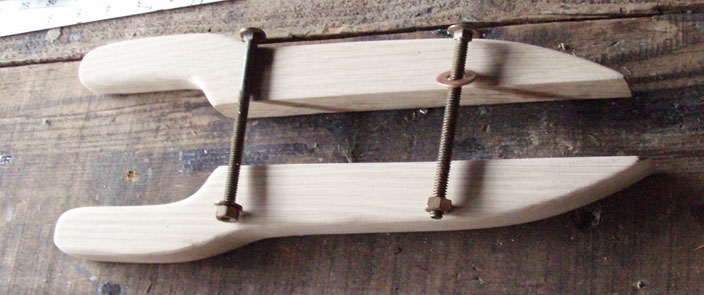
|  Left is the parts of the all-oak centerboard case temporarily fitted under the fir thwarts. This was not easy due to the complex curve of the bottom planks and the need to fit the ends of the case tightly under the forward and center thwarts.
The case will be capped with a piece of oak at the level of the thwart tops. Note that the forward floorplank-cleat is notched for the end of the case, and the next cleat and the center frame are cut to fit around the case. I'll also put in vertical braces on the side of the case where the case and center frame come together. |
|   The interior sides of the case get the first coat of red lead primer cut with turpentine -- also the two oak posts which will make the uprights at either end. A coat or two of marine enamel will also be applied to the interior before assembly.
On the right is the same 50-50 mix of red lead and turps on the bottom planks -- looks sloppy but it will discourage rot and provide a superb base for the interior paint. Lead primer isn't available here, so I've ordered it from Kirby's in New Bedford, Mass.
|
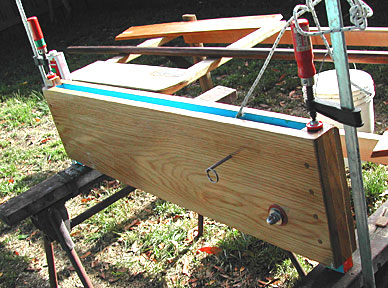
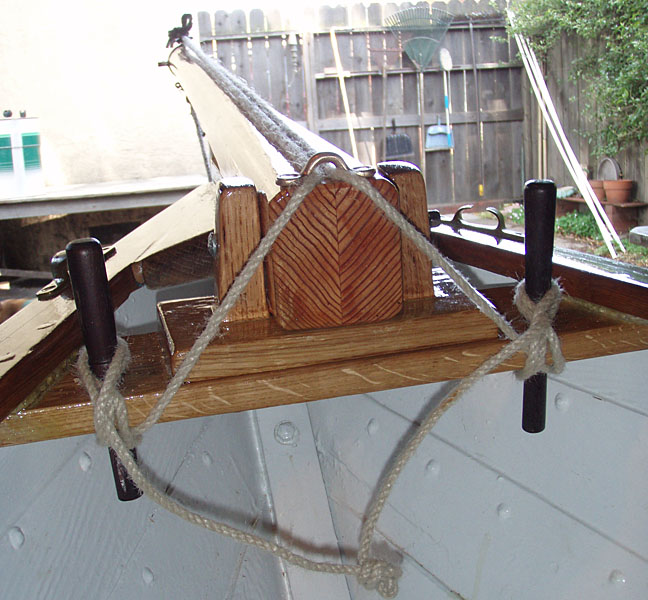
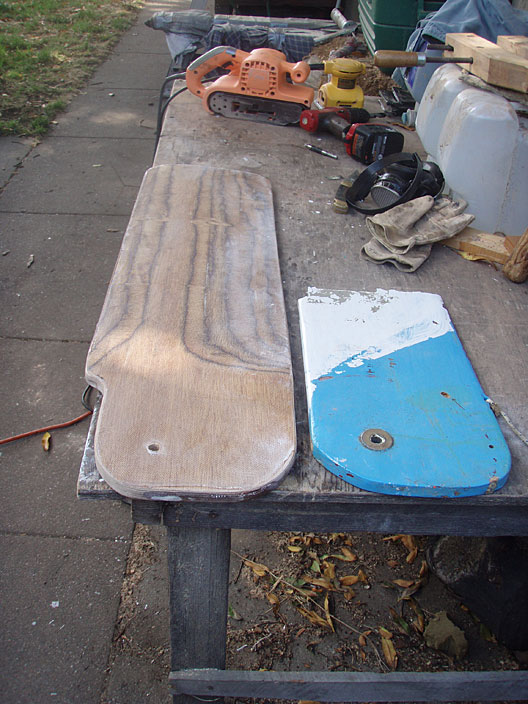
|   The centerboard case is positioned in the freshly painted interior. Inside of the case is painted with marine enamel, and sealed with Vulkem 116, outside will be sanded and finished bright. One side was unsealed to allow disassembly and installation of the centerboard and pivot pin.
Opposite is the centerboard with its final coat of marine enamel and the large stainless steel washers epoxied to the outside of the board where the stainless bushing (pipe) runs through the hole for the bolt. Note the attachment point for the pennon on the aft edge slightly below the bolt -- this is as low as the pennon can attach and still not drag in the water if the board is all the way down.
|
|  I had to fair the bottom edges of the left side of the case after final assembly as it shifted up 1/4" or so -- time for the beltsander. Here is the case after assembly, levelling and drilling holes for the position pin, getting a final coat of CPES. This pin holds the centerboard in one of three positions: fully up, 45 degrees down, and fully down. Got this idea from the position pin on my San Juan 21's 600lb swing keel -- one hole in the case mates with an arc of three holes in the centerboard.
|
|  The centerboard in the 45-degree position gives an idea where the resistance to the force from the sail will be, although testing will be needed to determine the correct position for both masts and sails.
With the centerboard case installed and sealed, the bottom is painted with red lead. Knotty fir planks are used for the false or sacrificial bottom, and these will be bedded onto the bottom with Dolphinite, a non-adhesive bedding compound. But first the planks have to be fitted to the rocker (or curve) of the bottom as shown by this photo. |
| 
|
| 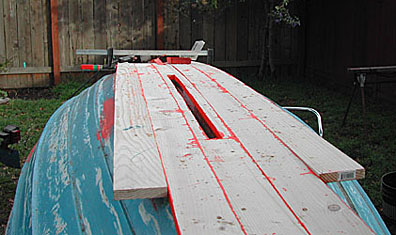 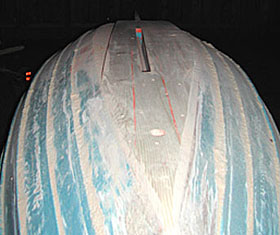 The planks are primed and attached to the bottom. The night photo shows them trimmed and beltsanded to shape. The port plank failed and will be replaced.
|
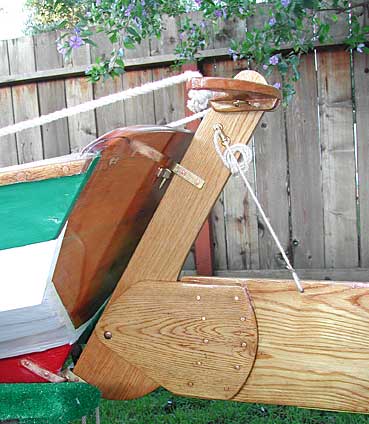
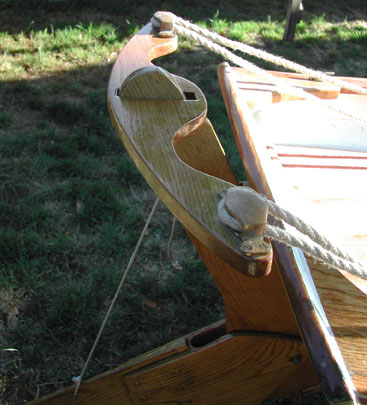
|   This photo of a kickup rudder design for a dory is from the John Gardner Classic Small Craft book. It should balance well with the longer centerboard, as the blade of the rudder is over 2 1/2 feet long.
The rudder is oak and the blade is weighted with lead like the centerboard to make it stay down unless sailed into shallow water. The blade is made from two pieces of oak glued together, then shaped into a foil. Here the lead is epoxied in and the edges of the cut filled with "peanut butter", aka epoxy mixed with sawdust from the oak into a thick paste.
|
|   Here's the finished rudder blade's starboard side, with the oak cheekpieces copper rove riveted and epoxied in place.
On right is a detail of the copper fasteners -- just large copper nails and copper washers on the back, with the nail cut and peened onto the washer to form a rivet.
|
|  The rudder is fully assembled and and mounted on the transom. These photos show it kicked up as the dory isn't propped up high enough to let the blade hang straight down.
I picked up an ash plank at Handloggers in Richmond for the tiller, and roughed it out to check the angles. It seemed a bit thin at the rudder end, so I glued two 7/8" lengths of ash together for eventual use as a tiller -- until then I'll use the yoke tiller head below.
|
| 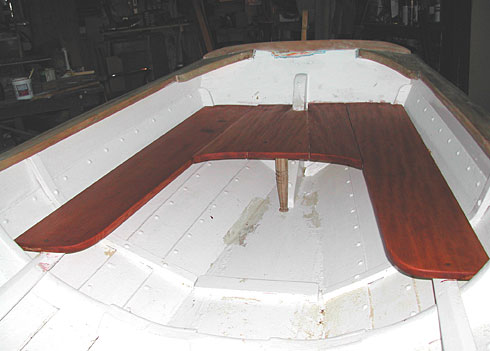 The rear seat, aka "sternsheets", is supported aft by horizontal supports attached to the transom, in the middle by an ash crossbrace and oak post, and forward by the rails that support the thwarts.
The fir planks have been stained to match the original thwarts, and attached to the various supports. An oak half-round molding will go along the transom to keep water from collecting behind the back of the seat planks, and a backboard will be installed to allow the helmsman or passenger to lean back without being poked by the stern knee.
|
|   Here is the red oak yoke head for the rudder. Red oak is not usually considered suitable for boatbuilding, but I had a very nice piece left over from previous projects. All other oak in the boat is white oak. Here is the red oak yoke head for the rudder. Red oak is not usually considered suitable for boatbuilding, but I had a very nice piece left over from previous projects. All other oak in the boat is white oak.
Steering ropes or lines will run from holes in the ends of the yoke arms forward to blocks on the aft frames, and from there can be operated from nearly anywhere in the boat.
|
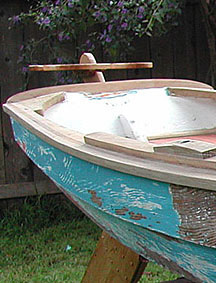
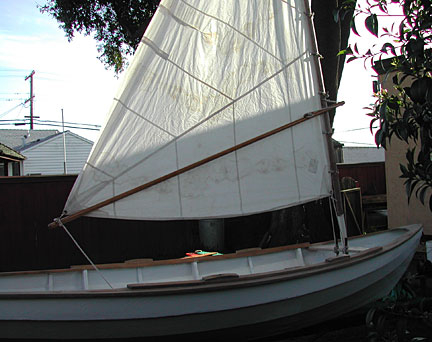
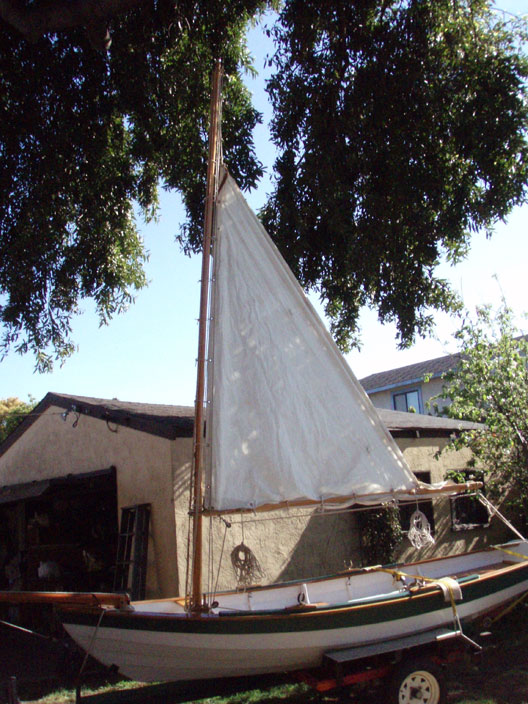
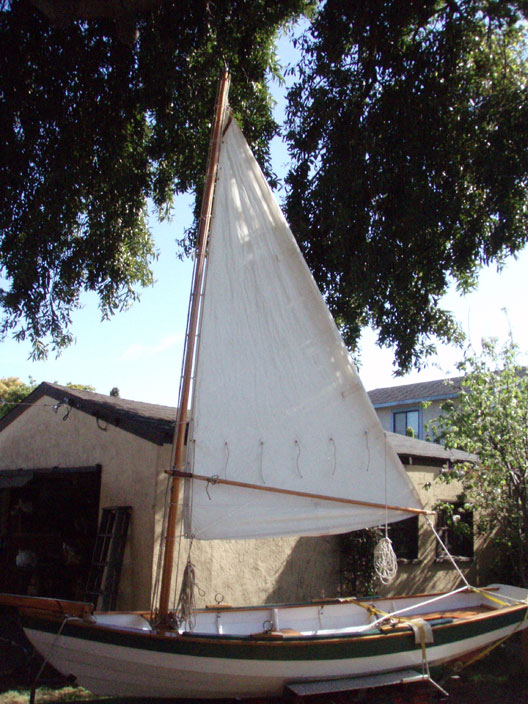
| 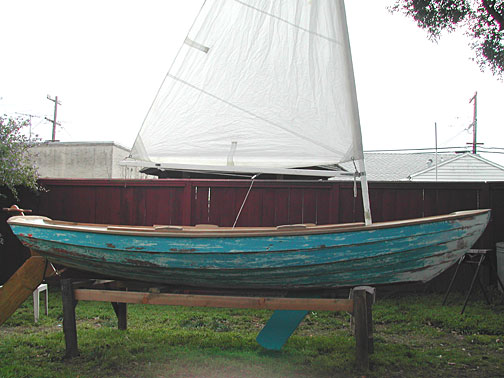 Here she is with the Sabot mast, boom and sail. The mast has a slight rake aft, which pulls the end of the boom up slightly when the boom is swung out to the side and the boat is heeled over -- hopefully keeping the boom out of the water.
The balance between the sail and the resistance from the centerboard + rudder will require some sort of small jib and bowsprit to move the sail-area forward. At this stage I'm still shopping eBay and Craigslist for a suitable small jibsail.
With most of the fun projects completed, it is now time for the very hard work of preparing the outer hull for caulking and paint.
|
| 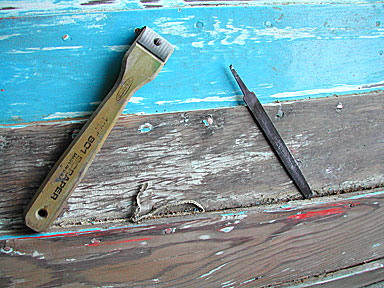 To prep the outer hullplanks for painting, the old paint must be removed. Les, one of the Wooden Boat forum participants in the Bay Area, came over with his heatgun and scraper and showed me how to do it right. After scraping and sanding, the soft caulking between the planks is removed with a 'reefing' tool made by heating the tang of a file, bending it 90 degrees and filing the tip to a chisel edge.
|
|  After removing as much paint and caulk as possible, the planks are sanded and get the first coat of CPES.
Once that cures for a few hours, the caulking is replaced and the whole thing cures for a few days. Then fairing compound is applied to any uneven parts before a final CPES coat and paint.
|
|  I'm using Vulkem 116 polyurethane sealant per recommendations on the Wooden Boat forum, and all Smith & Company epoxy products 'cause I like Mr. Smith and he's been very helpful in explaining the uses of his company's varied products -- their factory and warehouse are right across the road from my wife's workplace in Richmond.
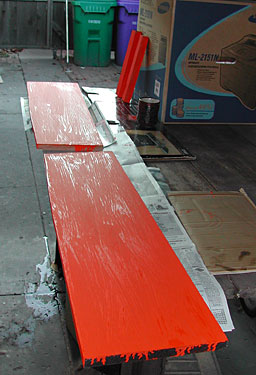
Three strakes coated with Rustoleum Marine high-build primer, which will be sanded, repainted and sanded again before the topcoat of Rustoleum Marine enamel is applied. Even though both of these products are rated for 'above the waterline only', the general consensus is that this is fine for daysailed trailered boats.
The false bottom is painted with discount-priced ablataive red bottom paint from the West Marine outlet store in Oakland. Bottom paint isn't necessary on trailered boats, but it binds well to the knotty fir and will keep any slime or growth off the bottom if the boat is left in salt water for a few days.
|
|  For the cotton canvas traditional sail, I've rigged up parrels to attach it to the oiled mahogany mast. The wood beads help raising the sail by rolling up the mast, and the toggles allows the sail to be removed from the mast without dismounting it. The mahogany mast, beads, toggles, and wooden cleats are coated with the traditional 50-50 mixture of boiled linseed oil and turpentine. The parrel line is 4mm Hempex from the UK, available from R&W Rope Warehouse -- a traditional look with modern rot- and UV-resistant materials. I'm using Hempex for all rigging and lines on the boat.
|
| 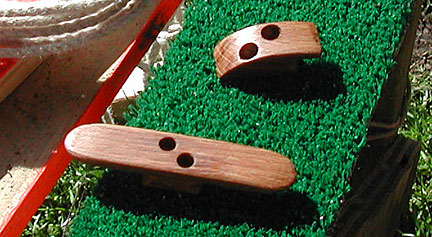 I've been making many of the cleats and other boat parts from white oak and mahogany when possible. Here is the thumb cleat that holds the snotter in place on the mast, and a standard cleat for the free end of the snotter on the spritboom. I've been making many of the cleats and other boat parts from white oak and mahogany when possible. Here is the thumb cleat that holds the snotter in place on the mast, and a standard cleat for the free end of the snotter on the spritboom.
|
|
Here is the spritboom in place, held up and tensioned by the snotter, a piece of 6mm Hempex that loops over an oak thumb cleat on the mast, runs forward though a hole in the forward end of the spritboom, then back to a standard oak cleat on the boom. The spritboom is a piece of clear Doug Fir with a hole in either end, coated with linseed oil and turpentine, then varnished.
|
| 
After an unusually exciting turnover of the boat (hopefully the last for awhile), I mounted the mahogany mast and found the sail set far too low. The tip of the spritboom was about 3" above the gunwales. So, just as I did for the Sabot mast, I made up a 18" extension (28" overall) to raise the spritboom to the same height as the Sabot boom. |
|
|
| 
Since I was working on the mahogany mast anyway, I beltsanded quite a bit of excess wood and weight off the entire length of the mast - it was easily 1/2" too thick. After sanding it into a more rounded shape, it was finesanded and coated with the usual turpentine and boiled linseed oil mixture. The same mixture was used on the mast partner, shown set up above with two small mahogany belaying pins at the base of the mast. |
|
|
| 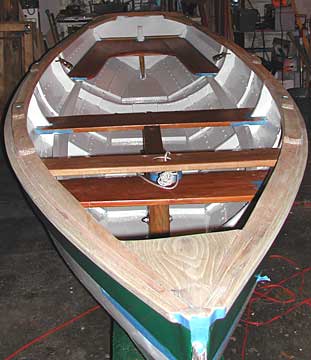 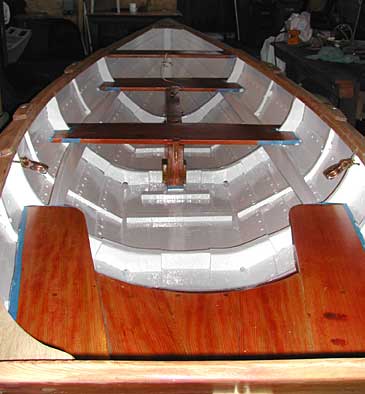
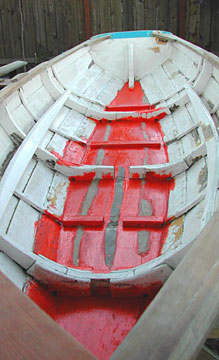
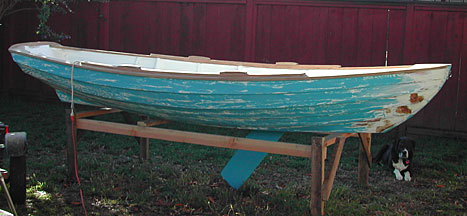
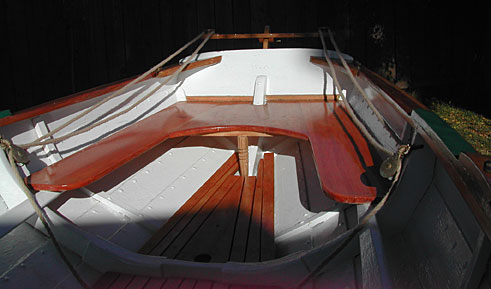
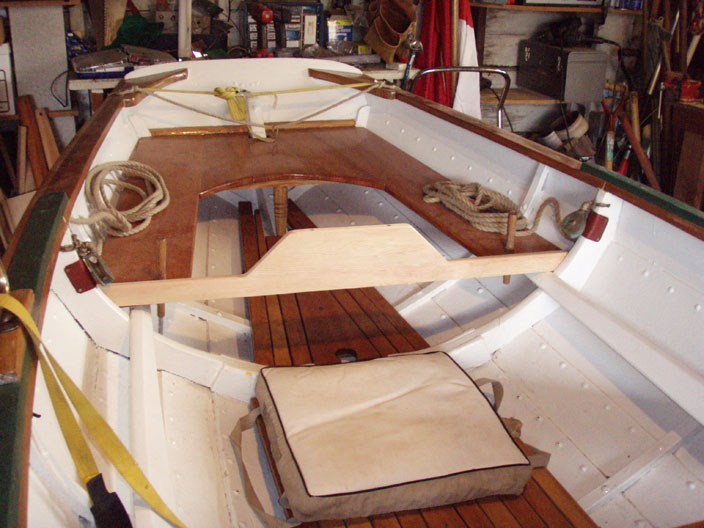
The freshly-painted interior from bow and stern. The gunwales and all other wood around the top of the hull still needs finishing.
|
| 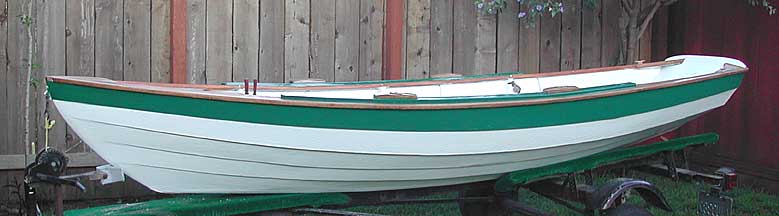
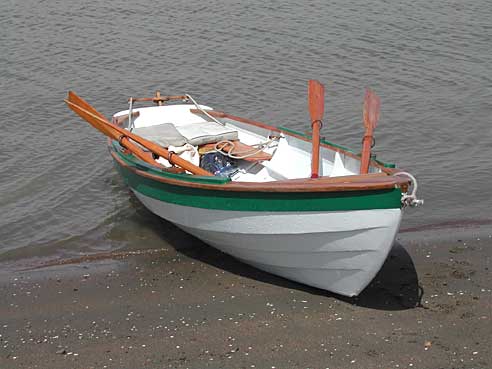
Ready for the water! Still a lot to do, including removable floorboards, mahogany backrest for the sternsheets, building and mounting a short bowsprit, and many other rigging jobs.
|
| The oarpads were also painted Kirby's Blind Green, and the gunwales, breasthook and transom knees coated with Watco oil and turpentine. The belaying pins were turned on a friend's lathe from mahogany.
|
| The removable yoke tiller is pinned with two brass rods to the head of the kickup rudder. The blade is shown fully raised, held with a Hempex line through a brass tube jam-cleat from Davy hardware in the UK. The rudder lines are all set up for steering from anywhere in the boat.
|
| Les Schuldt, one of the Wooden Boat "Forumites" and an active wooden boat restorer, came over for Lauch Day -- and was a tremendous help! We launched from the ramp at Marina Bay in Richmond.
|
| We first rigged the traditional mahogany mast and canvas sail with sprit-boom. I rowed out into the harbor, then sailed back downwind to the docks, and she handled very well. As with any 'maiden voyage' there were a few bugs to work out -- like cutting out the cork in the centerboard case top to push the board down -- not enough lead in the weight, apparently.
For photos of the launch day and other events, take a look at Thorne's Sailing and Event Photos .
|
|
|
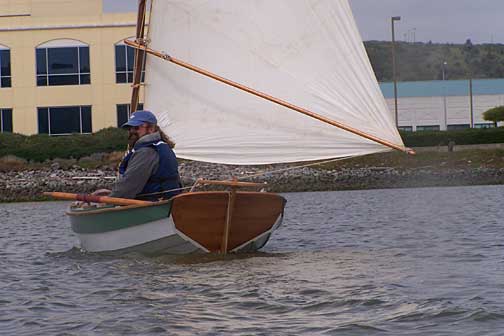
| We were all surprised at how well it all worked out, considering the sail rigs and many other elements of the restoration were done without any plans. As expected, the boat has issues with weather helm when the wind kicks up, and will need a jib to balance the sailplan and improve handling. The Sabot mast, boom and sail also worked well, and provided some exciting sailing.
|
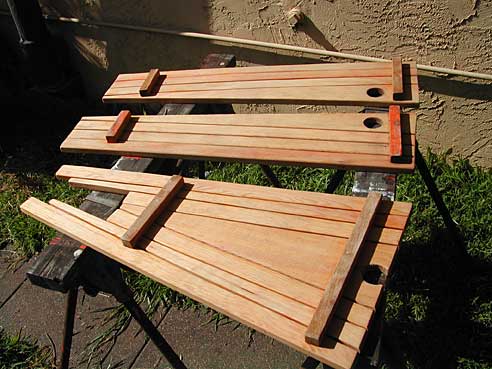
| Still lots of work to do on the boat! Nearly done with making the fir floorboards. Here are the forward and aft sections, upside down and drying out after getting wet and muddy today. They are sealed with oil and turpentine, with the oak support cleats coated with CPES and red lead primer where they meet the fir slats.
|
| NOTE 5/07 - this is not recommended except for those on a serious budget -- the quality of metal and parts on my two HF trailers was poor, as I had to buy a second one to replace the axle, bearings and spindles on the first. Commercial boat trailers are much easier to use, and safer to tow.
|
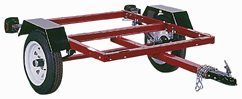
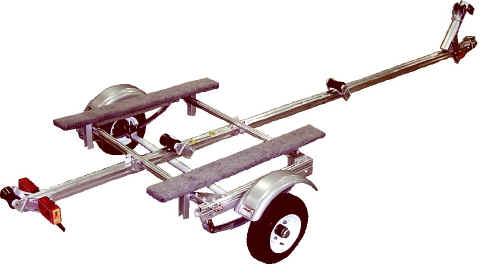
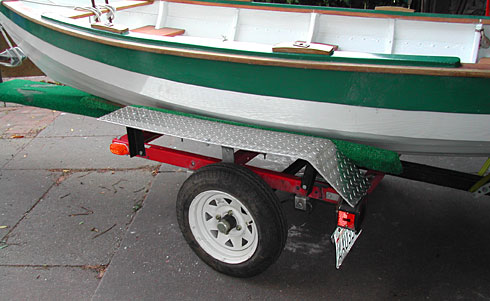
|  Above - the $160 Harbor Freight Utility Trailer and the $750 Trailex Small Boat Trailer -- the hopeful "before" and "after" plans! Modifying a cheap Harbor Freight utility trailer into a decent boat trailer proved to be quite a project. I found the model with 12" wheels on sale -- suchadeal! First step was to replace the short tongue with a 13.5' 1/4" mild steel 2.5" square tube from Alco Metals in San Leandro. Next was to pack the wheel bearings with marine-grade grease. Still looking for Bearing Buddies to replace the standard grease cups on the ends of the axles.
|
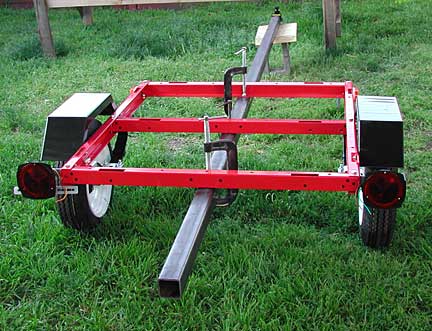
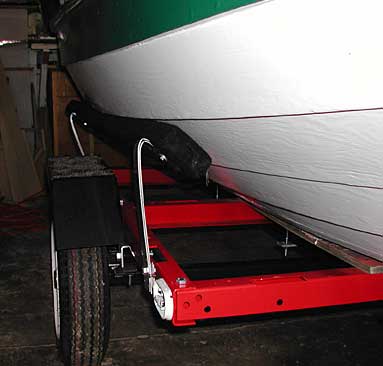
|  I bought an expensive carbide bit to drill the holes, which speeded up an otherwise painful process. Here it is with the tongue held onto the frame with square-top U-bolts, rear keel roller in place, and plywood sheet just laid on the frame. The ply will be covered with carpet and bolted to the frame to support the flat bottom of the dory. Near-vertical trailer bunks will hold the dory upright and support part of the hull.
The weakest part of this method is the small metal plates under the U-bolts, which need to be replaced with heavier metal. The tongue and fenders have been painted with an extra coat of Rustoleum flat black enamel, and sand scattered on the fender tops for traction. The rear keel roller supports the back 1/4 of the boat, so it needs to be strongly mounted.
|
| 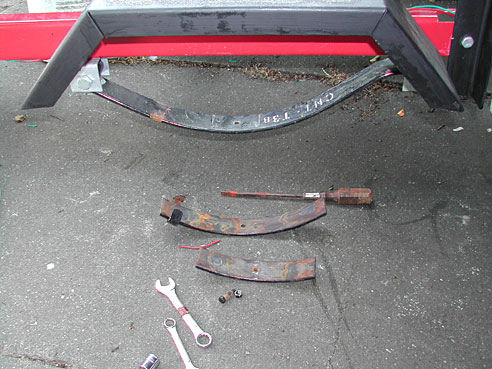 I removed the two extra leaf springs per side, but it didn't seem to soften the ride much - I guess I was spoiled by the coil spring / shock combo on the old trailer, which was a Holsclaw suspension and frame roughly welded to a different axle.
|
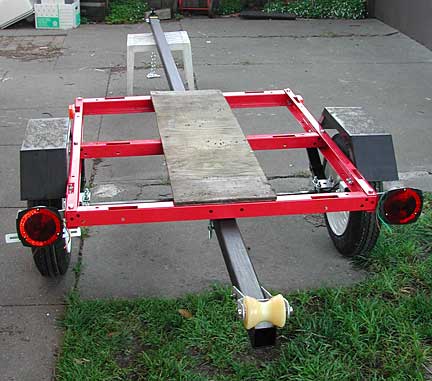
|  Version 1 bunk supports. Got the bunks and rolling jackstand installed, ply bolted to trailer frame, and boat on the trailer -- not bad for an evening's work.
|
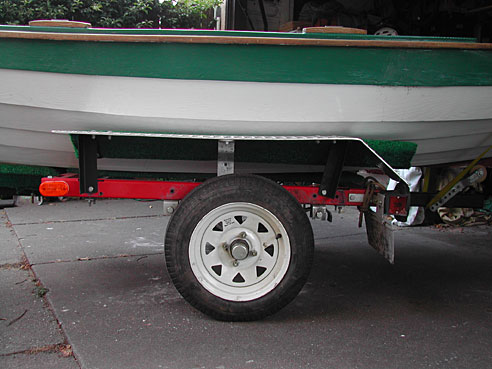
| 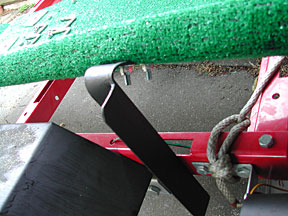 Version 2 bunk supports. The doubled-metal straps failed to hold the bunks in place. Replaced the bunk supports with 1/8" angle iron 2x2x3 mild steel, but couldn't get the metal hot enough with just a propane torch to do a proper bend -- got some cracking. The bunks just hold the dory upright, as it rests the flat bottom on the trailer bed.
|
|  Version 3 bunk supports. Well, the version 2 angle-iron heated with my propane torch didn't work. After 10 miles of rough trailering on gravel roads to reach Butte Lake near Mt. Lassen, one of these broke along the bend. The cheap Harbor Freight Chinese steel fenders also failed -- they aren't strong enough to be used as a step, and the steel broke where bolted to the trailer frame. So now I need something strong enough to be a step as well as limiting the tire spray onto the boat. Here is version 3 of the bunk supports, 1/8" angle iron cut along the join, then each strip of steel heated cherry-red with a friend's welding rig and bent in a different direction. The downward angled piece is bolted to the bunks, and the 180-degree bend will bolt to an aluminum treadbrite plate.
|
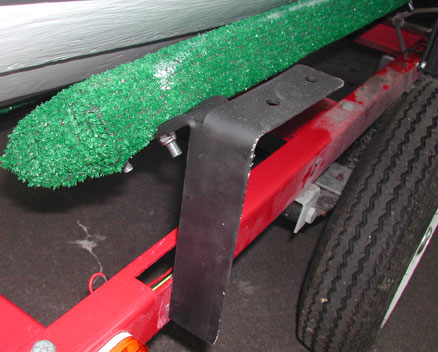
|  All done! The new fenders have a commercial heavy galvanized steel trailer fender "L-bracket" support bolted to the trailer frame near the axle, which braces the center. The rear portion of the plate is angled down at the back to catch as much spray as possible.
|
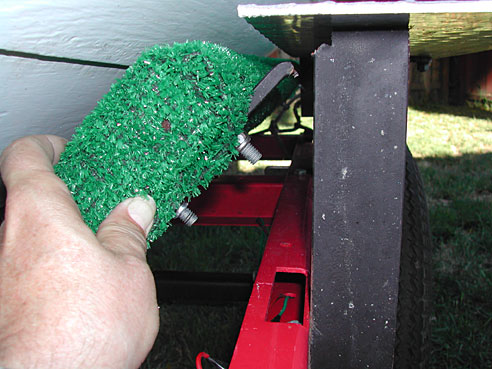
|  The fenders are bolted to the bunk supports and fender support with galvanized carriage bolts -- which provide a nice round head for the step top, and pulled nicely into the soft aluminum to lock into place.
|
|  Well, after another rough trailering trip to Eureka and back, one of the new bunk supports broke, letting the fender edge scratch the paint just a bit. I may have to make up something much heavier, or from cast rather than bent steel.
|
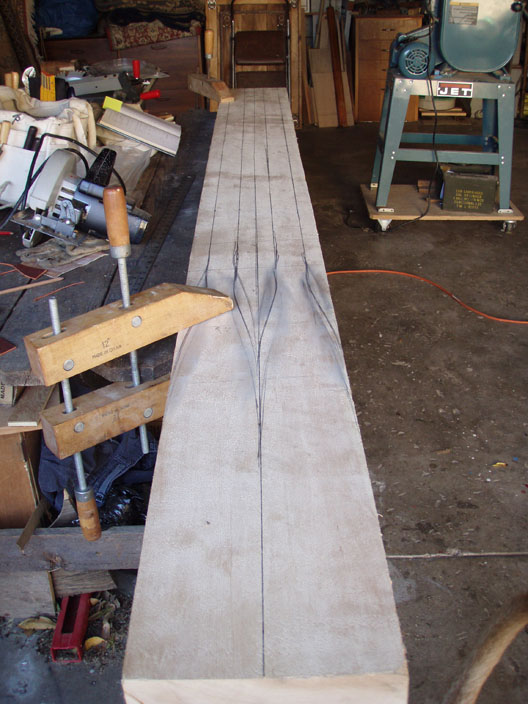
| 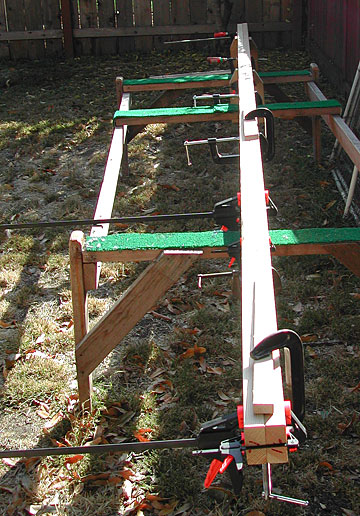 After breaking both the Sabot and Snipe masts at the extensions, I build a 16' mast from two Doug Fir 2x4's glued together.
I used the Weldwood glue that requires warm temps and LOTS of clamping pressure -- not a complete success, as I ended up clearing out the joint at the base and using epoxy later.
|
|  The mast was planed into an oval, sanded into final shape, coated with CPES and then varnished. The top has one hole strung through with the strong polyester yacht marline, holding bronze blocks for the jib and mainsail halyards.
|
|  With the new yoke tiller head in place and a freshly-varnished bowsprit #3, the Lord Chamberlian is certainly happy to see you... (grin)
|
|  The new yoke tiller head is several inches wider than the older one, and has bronze cheekblocks on the ends of the yoke arms.
|
|  Combined with the fixed blocks attached to the aft frame, this gives the steering lines a 2:1 pull, making steering on windy days much easier on the hands.
The steering lines attach to bronze pad eyes on the frames, run aft through the cheekblocks, forward again to the bronze blocks on the frames, and then any direction or location in the boat for balanced steering under any conditions or number of crew.
|
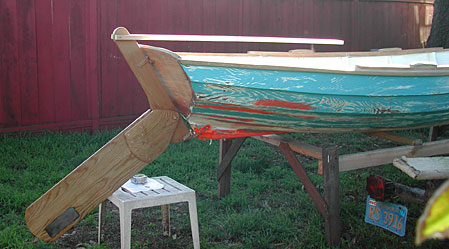
|  May, 2007. Bowsprit #4 is much heavier, made from two Doug Fir 2x4's epoxied together and shaped with my power planer. The previous bowsprits were either too weak or put too much pressure on the breasthook and needed another support. The cranse iron on the end of the sprit was picked up at a marine flea market in Sausalito in March, along with some other nice bronze hardware.
|
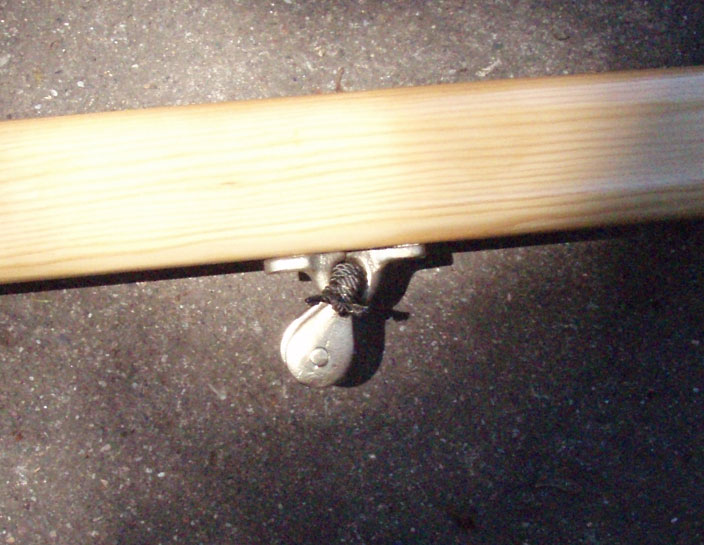
|  The bowsprit is supported aft by an oak partner and two small upright bits, as well as being bolted to the breasthook like previous sprits. I'm trying various methods of setting up a running loop of line to run the jib out to the end of the bowsprit. Here is a nylon clamcleat and bronze padeye taped into place to see what works best.
One of the fun parts of building is experimenting with different materials and tools. You can see the tan lumpy glue at the edges of the partner under the gunwales -- this is PL Premium tube adhesive, a well-regarded glue that is replacing epoxy for some marine applications. Other parts of the boat, including the oak block on top of the partner and the bowsprit itself, are glued with epoxy from Smith & Company here in Richmond.
|
|  Here is my first attempt at cleating the running loop for the bowsprit outhaul. With any luck the jibsheets won't snag on the belaying pins -- we shall see.
|
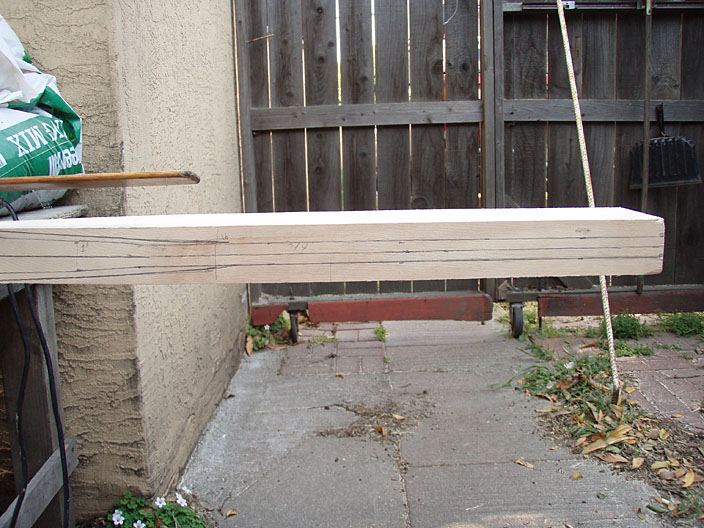
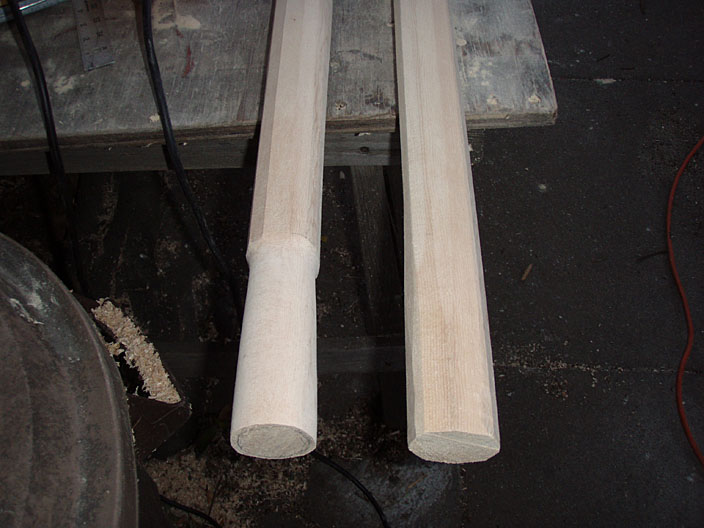
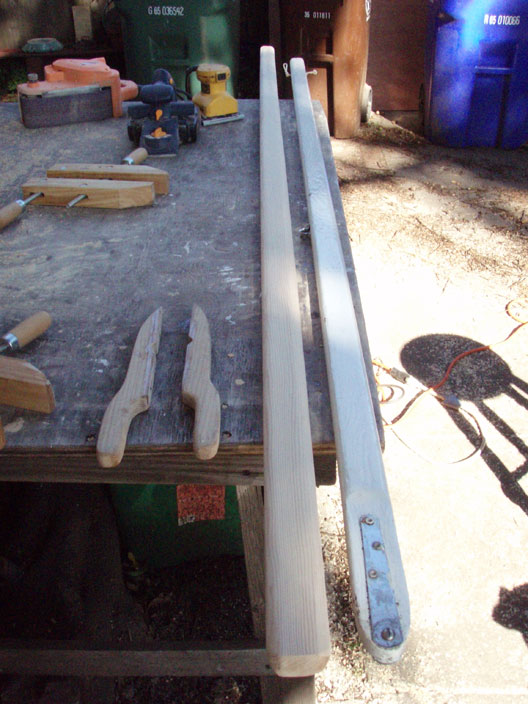
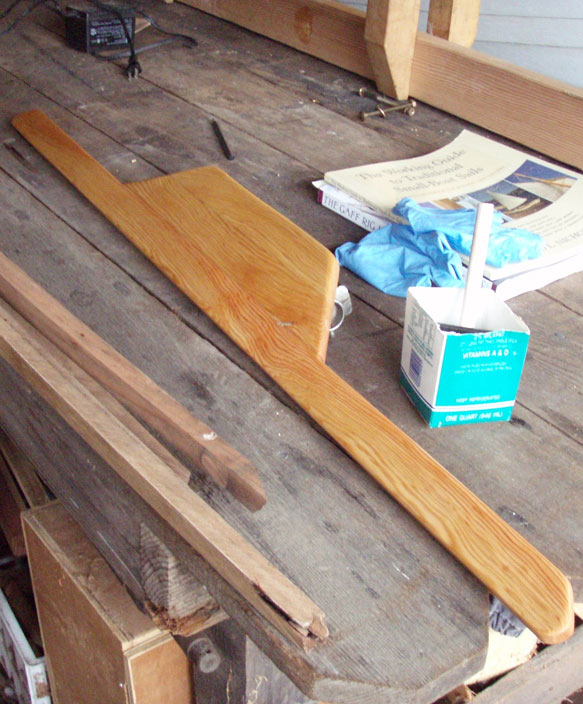
|  After losing one of my 7' oars on the Petaluma River, I decided to make a longer pair -- 8' is as long as can be stored on the floorboards of the boat. I picked up the only 2" thick x 8' long spruce plank at MacBeath Hardwoods in Berkeley, and traced out the pattern as shown in Pete Cullers _Boats, Oars & Rowing_.
|
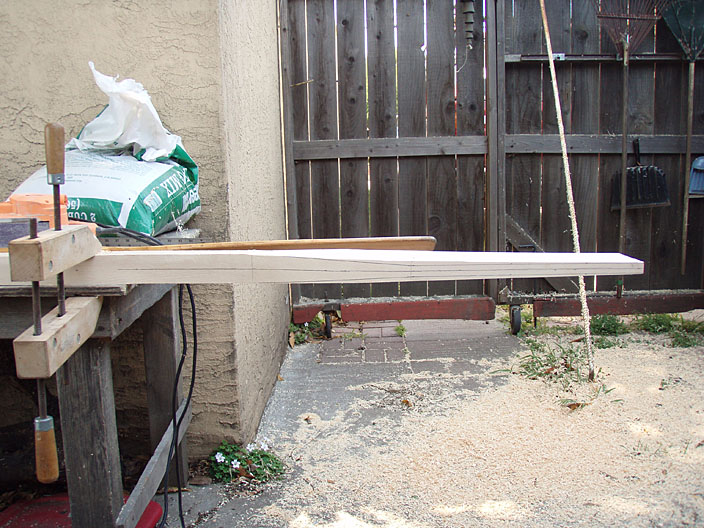
|  Rather than make laminated oars, which are the most common due to better use of the spruce, I went for solid oars. The oar blanks are cut out, now to plane down the blade ends into the correct shape and thickness.
|
|  The power planer was essential for this job, and filled the shop area with shavings.
|
| 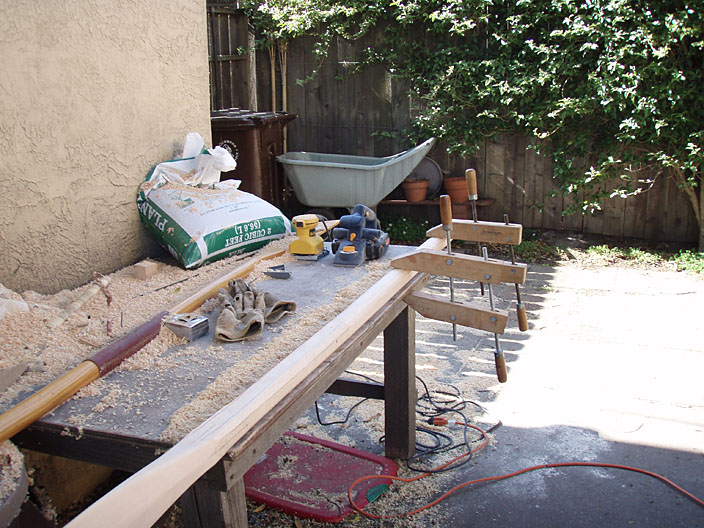 The handles are roughed out into octagonal shapes, leaving as much wood near the grips as possible to balance the weight of the blades.
|
| 
|
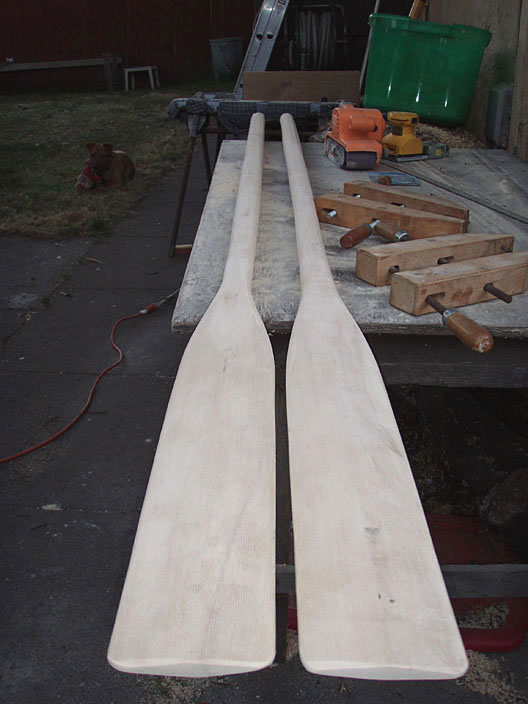
|  I made my grips oval to provide better control of the oars and a more natural grip for my hands, which tend to blister after rowing more than 6 miles or so.
|
| 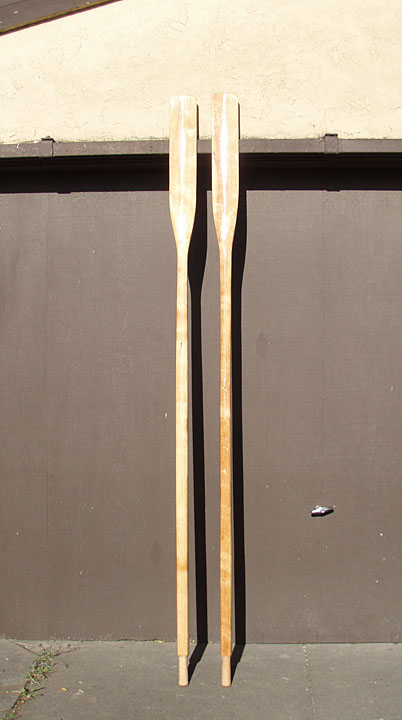 The first coats of linseed oil and then varnish really made the spruce look a lot nicer. Next job is to make oar leathers and buttons.
|
| 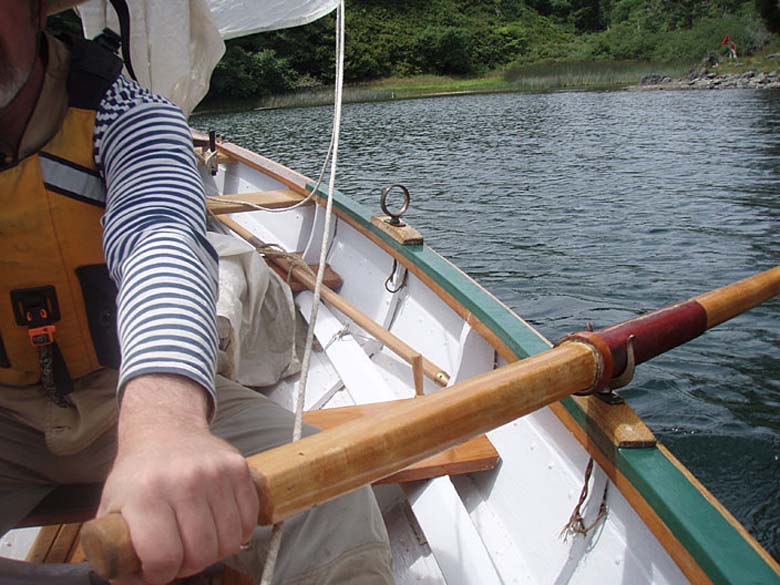 Here they are being used by John at Stone Lagoon.
|
|  We had a lot of fun at the Vallejo Pirate Festival in mid-June, but the high ferry wakes and low tides took their toll -- particularly on my centerboard! It broke just below the first lead insert, which must have weakened the board by leaking water into the plys.
|
|  I'll either make one from metal with ply sides epoxied on to give the correct foil shape, or from stronger ply or white oak.
|
|  Picked up a 1/4 sheet of Meranti marine ply from MacBeaths, cut it in half lengthwise and glued the pieces together with my very slow cure epoxy from Smith & Company. Mary went to TAP Plastics and picked up a quart of fast-cure epoxy, which cured in 1/8th the time but has a problem with "blush", aka waxy deposits on the surface..
|
|  To create the correct NACA 12% foil shape, I marked off 1" widths and shaped it with the belt sander.
|
|  There is more shaping to do in order to get it to hang straight down, as I made it wider than the old centerboard.
|
|  Testing cb in place with the dory on the cradle.
|
|  I put over 6lbs of lead in the end, to make sure it hung straight down even when sailing fast.
|
|  Here it is with the first coat of fiberglass cloth and epoxy. More layers of epoxy were added, but no further glass was needed.
|
| 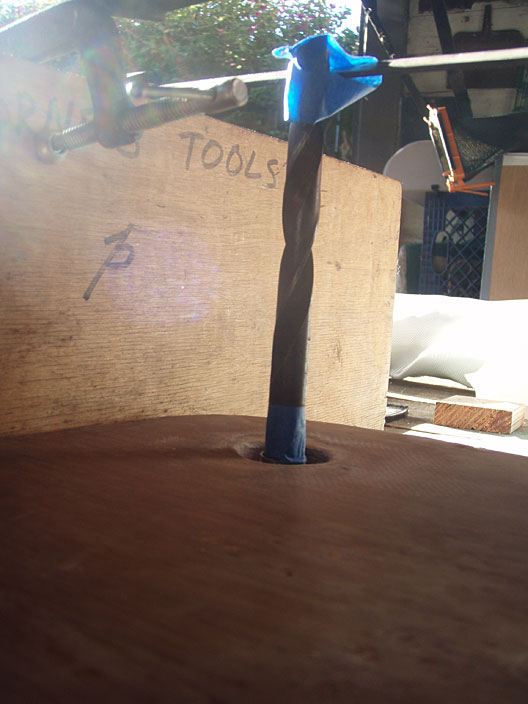 When drilling through plywood that will be under the waterline, it is important to drill an oversize hole, fill with epoxy, then re-drill for the fastener. For the critical centerboard bolt, I had to carefully get the stainless steel bushing aligned at 90 degrees to the board before pouring the epoxy thickened with cabosil fibers.
|
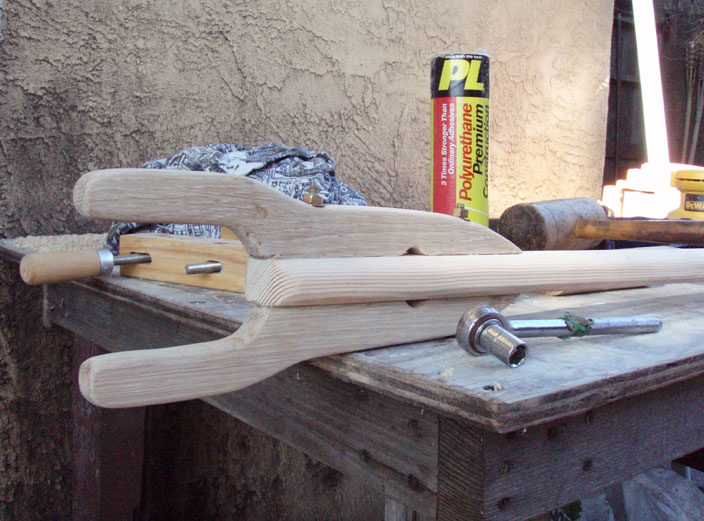
| 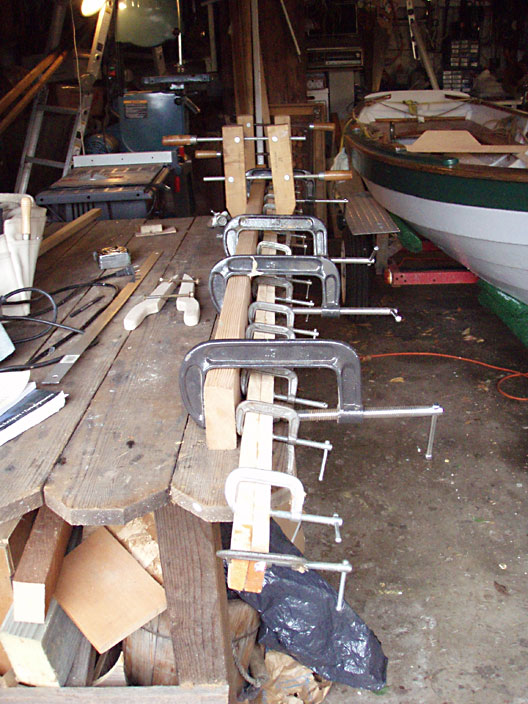 In order to be able to reef the mainsail, I needed to build a boom. I got a clear grain Douglas Fir 1"x4" and cut it in half, then epoxied the two halves together. Here they are clamped to a 2x4 to keep the pieces straight while the epoxy cures.
|
|  Rather than have a metal gooseneck, I chose a gaff jaw design, which allows the boom to easily be adjusted up and down the mast. The gaff jaw design also lets the boom be raised parallel to the mast for quick sail stowage and furling. These jaws were cut from scrap white oak, and will be glued and bolted to the end of the boom.
|
|  The glued-up fir boom broke when stress-tested by bending sideways, so I picked up a clear fir 2x4 and trimmed it to 1 1/8" thick by 2" wide on the tablesaw. Several passes with the planer and beltsander rounded the edges nicely. I made it a few inches longer than the old boom that came with the Sabot sail and mast.
|
|  I used PL Premium instead of epoxy this time to glue the gaff jaws onto the boom -- you can see how cheap I am, as I've used up the tube in the caulking gun and then cut the top off to get at the last bits of gluey goodness. Todd Bradshaw from the Wooden Boat Forum suggested cutting the two notches in the inside edges of the jaws, as they can be used to hang blocks for tack or downhaul lines.
|
|  I also used PL Premium to glue the leather onto the jaws of the gaff boom one it was varnished, and hung a rather large wooden block that I'd picked up on eBay several years ago. The scissors clip above the block clips onto the tack of the sail, allowing the boom to pull the sail down when sheeted in tight - aka 'self-vanging'.
|
|  I added a small block in the middle of the boom to keep the mainsheet from hanging down and/or throttling anyone sitting forward.
|
|  The aft end of the boom has two holes for mainsheet blocks and lashing the clew of the sail, plus further forward a fairlead on one side and a cleat on the other for the aft reefing line. Tarred nylon seine twine is used to lash these blocks and clips in place -- it is very strong and can be burned to seal the ends, unlike the polyester marline.
|
|  Here you can see the rig set up for testing in the back yard, showing how sheeting in the main forces the boom to slide down the mast and tighten up the sail. The blocks were swapped out after these photos were taken with the larger block as above. The reeing lines are not yet cut in these photos, just hanging coiled in place.
|
|  The sail shows the new reef points, with 12" nettles on either side, and reefing lines attached to the front and back edges of the sail (luff and leech).
|
|  The reef makes the sail over 1/3 smaller to match the smaller jib that I bought on eBay -- we shall see how the rig balances in high winds.
|
|  Even though not designed to work on the spritboom, the reef nettles and lines can be used in a pinch -- but the sail will need some fiddling to make it look nice when reefed onto the sprit.
|
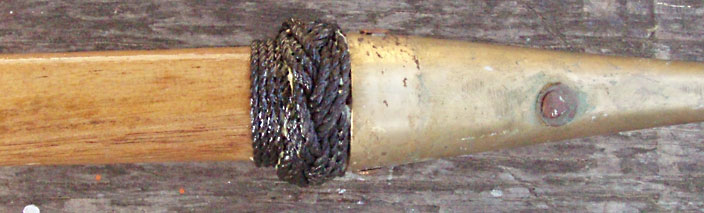
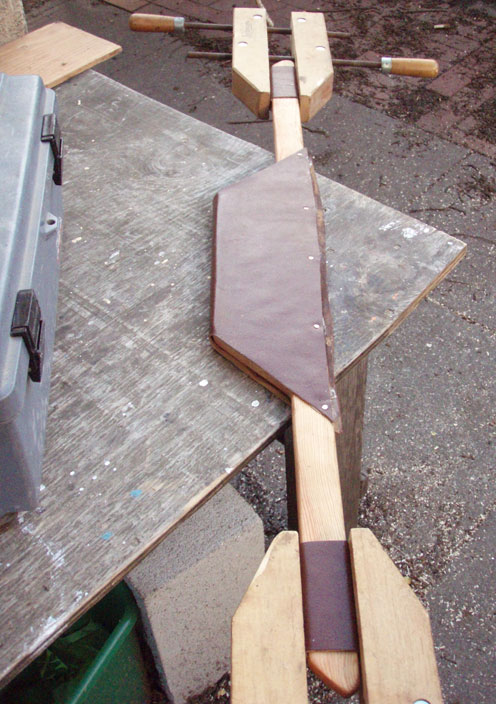
|  To avoid chafe on the mast, I glued leather and tied my first Turks Head knots in tarred nylon seine twine on either end of the leather pad.
|
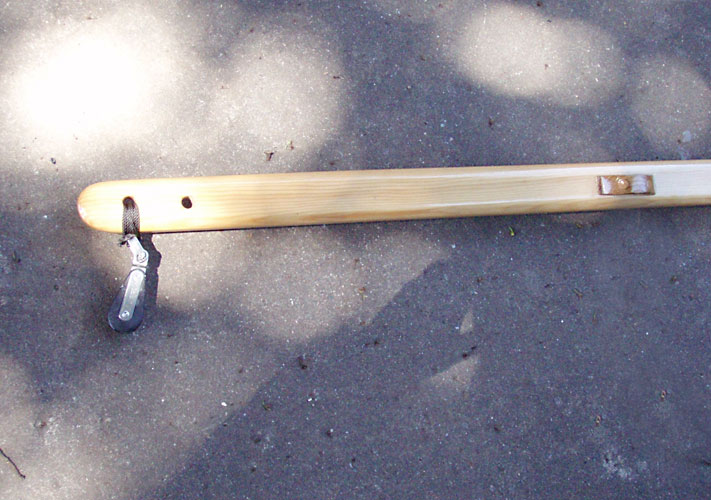
|  Once I figured out the complex Turks Head knot, I also tied it around the join between the boat hook head and shaft, with a rather sloppy glue job in...you guessed it...PL Premium.
|
|  Using a standard boom will enable me to set up a topping lift, but that requires more blocks at the top of the mast. I also plan on running a flag halyard, so want to have four blocks available. This "before" photo shows the double strand of incredibly strong tarred polyester yacht marline run through a hole and tied off to the mainsail and jib halyard blocks. The marline showed no wear after two seasons of sailing.
|
|  I removed this Davey mast band from my old mahogany mast, but had to cut out most of the wood instide the band as the PL Premium and leather shims held it on very well. Glued it on the fir mast the same way, using a scrap of flat pine and a wooden mallet to seat the band firmly. I filled the hole through the mast with PL Premium, which caused quite a bit of glue to come out from under the band, as the glue expands by what seems to me to be 5% or so.
|
|  To keep my weight centered in the boat, I need to at the very least sit on the floorboards forward of the rear frame, but wasn't sitting there very often as I had nothing to lean back against. So I glued up some scrap fir with PL Premium and screws, making a removeable backrest that fits between the forward ends of the sternsheets and the rear frame.
|
|  I gave it several coats of 50-50 Boiled Linseed Oil and Turpentine and let that dry for a few days.
|
|  To keep from marking the varnish and paint in the boat and to make it comfortable to lean against, I used copper tacks and PL Premium to put leather on the ends and center of the backrest. The edges of the leather will be trimmed later when the glue sets.
|
|
Chamberlin Dory (text from a museum website) -
Used for fishing and recreation, the dory-skiff is the most popular, although the smallest member of the dory family. This design was built by William Chamberlain of Marblehead, Massachusetts, during the late 1800s and early 1900s. It handles rough water with these features: a high, full bow; low freeboard to reduce windage; a tucked, high, narrow, raked transom to handle a following sea.
| |